The Chocolate Frosty is a classic treat that almost everyone remembers getting from a fast food window during a hot summer day or as a special reward after a long week of school. This recipe is all about bringing that exact same joy into your own kitchen without needing a giant machine or a secret vault of hidden ingredients. We are going to explore how a few simple items sitting in your pantry right now can transform into a thick and creamy delight that rivals the famous original version. The goal is to capture that unique texture which sits perfectly right between a very thick milkshake and a soft serve ice cream cone. Making this at home gives you the power to control exactly what goes into your dessert while keeping that nostalgic flavor that makes your taste buds dance with excitement every single time you take a cold spoonful. It is a wonderful way to treat yourself or your family to something that feels very fancy but is actually incredibly easy to master in just a few minutes of your time.
People absolutely love this specific treat because it hits a very particular spot that other desserts just cannot seem to reach. It is not just about the sugar or the cocoa but rather the way it feels as it melts slowly on your tongue and provides an instant cooling sensation. There is something deeply comforting about the mild chocolate flavor which is not too dark or bitter but just sweet enough to satisfy a craving without being overwhelming or heavy. Children adore it because it is fun to eat with a spoon or a straw and adults love it because it reminds them of simpler times and childhood memories of road trips and weekend outings. The consistency is the real star of the show here because it is smooth and velvety and light all at once which makes it very addictive. You will find that once you take the first bite it is very hard to stop until the very bottom of the glass is completely empty and clean.
You should make this recipe whenever you feel like you need a little bit of extra happiness in your day or when the weather gets too warm to handle. It is the perfect companion for a backyard movie night or a small birthday party where you want to impress your guests with a homemade touch that everyone already knows and loves. From a fitness perspective it can be a much better alternative to store bought versions because you can choose to use lower fat milk or natural sweeteners if you are watching your calorie intake closely. Sometimes we just need a moment of peace and a cold chocolate treat is a fantastic way to practice a little bit of self care after a busy day of work or chores. It also works as a great bribe for kids who need to finish their homework or as a quick snack when you have unexpected friends dropping by for a visit. Taste is the primary driver here but the emotional connection to such a famous dessert makes the process of blending it up even more rewarding for the soul.
Bringing this recipe to life does not require any expert culinary skills or expensive gadgets which is why it is so popular for beginners to try out. You do not need to spend hours over a stove or wait for things to bake in an oven because this is a quick process that focuses on blending and chilling. This article will guide you through every single detail to ensure that your final product is exactly as thick and frosty as you want it to be. By following these simple steps you will become the hero of your household and you might never feel the need to wait in a long drive through line ever again. Whether you are a student in a dorm room or a parent in a busy kitchen this method is designed to be fool proof and fun. Get ready to dive into the world of frozen chocolate goodness as we break down the ingredients and the method to make your very own Chocolate Frosty right now.
Ingredients You Will Need
To make this delicious treat you will need to gather a few basic items from your kitchen. Please make sure everything is measured correctly to get the best texture possible.
-
2 cups of high quality whole milk for a very creamy base
-
1 can of sweetened condensed milk which is 14 ounces in size
-
1 half gallon of chocolate milk if you want extra chocolate flavor
-
8 ounces of whipped topping to make it light and airy
-
1 tablespoon of pure vanilla extract for a nice aroma
-
3 tablespoons of unsweetened cocoa powder for a deeper color
-
1 pinch of sea salt to balance out all the sweetness
-
4 cups of ice cubes if you are using a high power blender
-
Optional chocolate shavings for a pretty garnish on top
Step by Step Method
Start by cleaning your blender and making sure the blades are sharp and ready to go. You want to begin by pouring your whole milk and your chocolate milk into the blender jar first. Adding the liquid at the bottom helps the blades move more freely so the motor does not get stuck. Next you will open the can of sweetened condensed milk and pour the entire thick contents into the liquid. Use a rubber spatula to scrape the sides of the can so you do not waste any of that sweet gold.
Now it is time to add your dry ingredients like the cocoa powder and the small pinch of salt. The salt might seem strange for a dessert but it actually makes the chocolate taste much stronger and better. Add the vanilla extract at this point as well so it mixes thoroughly with the milk. Turn your blender on a low speed for about thirty seconds just to get all the liquids and powders combined into a smooth brown mixture.
Once the base is mixed you will gently fold in the whipped topping. If you are using a blender you can just put it on top and pulse it a few times. You do not want to over mix the whipped topping because the air inside of it is what makes the Frosty feel fluffy instead of like a hard block of ice. After the topping is incorporated you can start adding your ice cubes one cup at a time.
Blend on a high setting after each addition of ice. You are looking for a texture that is thick enough to hold a spoon upright but soft enough that you could still use a very wide straw. If it looks too thin you can add a few more ice cubes and blend again. If it looks too thick you can splash in a little bit more milk to loosen it up. Once you reach that perfect snowy consistency turn off the machine immediately.
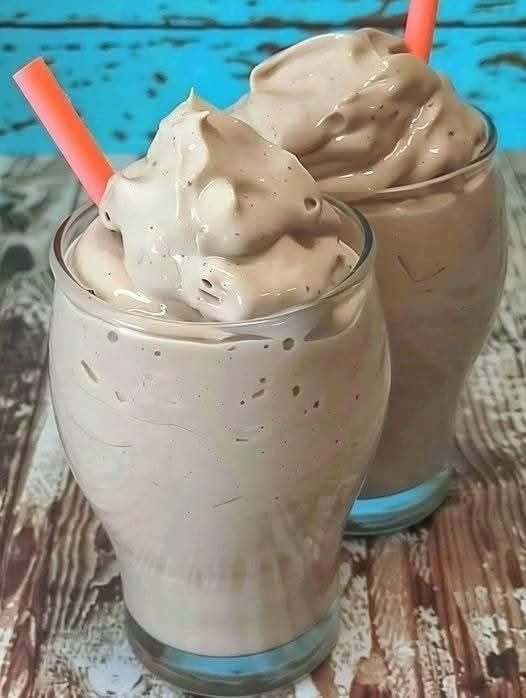
Pour the mixture into tall glasses that have been chilled in the freezer for a few minutes. Chilling the glasses helps the treat stay frozen for much longer while you are eating it. Grab a long spoon and maybe a straw if you prefer. You can sprinkle some chocolate shavings or even a little bit of extra cocoa powder on top to make it look like it came from a professional cafe. Serve it immediately because this recipe is best enjoyed while it is at its coldest point.
Why This Recipe Is Special
This recipe is special because it bridges the gap between a snack and a full dessert while staying very affordable for any budget. Most store bought frozen treats are filled with preservatives and artificial thickeners that you cannot even pronounce. When you make this at home you know exactly what is going into your body and you can feel better about serving it to your loved ones. The use of sweetened condensed milk is a secret trick that provides a level of creaminess that regular sugar simply cannot match.
Another reason this version stands out is the flexibility it offers for different diets. Even though the classic version uses dairy you can easily swap things out for almond milk or coconut milk and still get a great result. It is a very forgiving recipe that does not require perfection to taste amazing. The cooling effect of the ice makes it a literal lifesaver during heat waves when turning on the oven feels like a bad idea.
From a health perspective you are getting a good dose of calcium from the milk which is important for strong bones. Chocolate also contains antioxidants which are good for your heart and your mood. While it is definitely a treat it is a much more wholesome option than many other processed snacks found in the grocery store aisles. The joy of creating something with your own hands also provides a mental health boost and a sense of accomplishment that buying a cup from a window just cannot provide.
Extra Tips for Better Taste
If you want to take your Chocolate Frosty to the next level you should try freezing your milk into ice cubes instead of using regular water ice cubes. This trick ensures that as the treat melts it stays creamy and chocolatey instead of becoming watery. It takes a little bit of planning ahead of time but the difference in flavor is absolutely massive. You will notice a much richer mouthfeel that stays consistent from the first sip to the last drop.
Another great tip is to add a tablespoon of malted milk powder to the blender. This gives the drink a nostalgic malt shop flavor that adds a layer of complexity to the sweetness. You can also experiment with different extracts like peppermint for a winter version or almond extract for a nutty twist. If you like a bit of texture you can toss in a handful of mini chocolate chips at the very end and pulse the blender just once so they stay whole.
For those who love a salty and sweet combination try dipping salty french fries into your homemade Frosty. This is a famous way to eat this treat and the contrast between the hot salty potato and the cold sweet chocolate is a culinary experience everyone should try at least once. Always remember to use the highest quality cocoa powder you can find because the quality of the chocolate is the primary flavor of the entire dish.
Final Thoughts
Making a homemade Chocolate Frosty is a fun and simple way to bring a smile to anyone’s face. It is a timeless recipe that proves you do not need a lot of money or time to create something truly special and delicious. We hope you enjoy every creamy spoonful of this frozen delight and share it with the people you care about most. There is nothing quite like the satisfaction of mastering a classic favorite in your own home kitchen.
Nutrition Details
Below is a general guide for the nutrition facts based on a standard serving size of one large glass. Please keep in mind that these numbers can change if you use different brands or types of milk.
| Nutrient | Amount Per Serving |
| Calories | 320 |
| Total Fat | 12 grams |
| Saturated Fat | 8 grams |
| Cholesterol | 35 milligrams |
| Sodium | 150 milligrams |
| Total Carbohydrates | 45 grams |
| Dietary Fiber | 2 grams |
| Sugars | 38 grams |
| Protein | 8 grams |
| Vitamin D | 15 percent |
| Calcium | 25 percent |
| Iron | 6 percent |
| Potassium | 10 percent |
Disclaimer
This recipe is intended for informational purposes and general enjoyment. Please be aware that everyone’s body is different and individual nutritional needs or reactions to ingredients may change based on your health status. If you have specific allergies or dietary restrictions you should consult with a medical professional or a nutritionist before trying new recipes. The results of the texture and taste can also vary depending on the power of your blender and the temperature of your kitchen environment. Always supervise children when using kitchen appliances like blenders to ensure safety. Enjoy your treats in moderation as part of a balanced and healthy lifestyle.