Bread in a jar is a fascinating and clever way to bake fresh loaves that stay soft and delicious for a very long time. This recipe is essentially about baking your dough directly inside glass canning jars instead of a traditional metal loaf pan or a flat baking sheet. By doing this, you create a unique environment where the heat distributes evenly through the glass and the shape stays perfectly round and uniform. Many people call this canned bread because you can actually seal the jars while they are still piping hot from the oven to create a vacuum seal. This method allows the bread to stay fresh on your shelf for weeks or even months without getting stale or growing mold. It is a wonderful skill to learn if you want to always have high quality baked goods ready to eat without needing to bake every single day. The process might seem a bit unusual at first if you are used to standard baking but it is actually very simple once you get the hang of it. You just need the right kind of wide mouth jars and a basic yeast dough to get started on this fun culinary adventure.
People absolutely love bread in a jar because it combines the nostalgic charm of home baking with the modern need for convenience and long term storage. There is something truly magical about opening a pantry door and seeing rows of beautiful golden brown bread loaves waiting for you inside clear glass jars. It feels like you are a professional baker and a smart homesteader all at once. Fans of this method often talk about the incredible texture of the bread which stays much more moist than a standard loaf because the glass helps hold in the natural steam during the baking process. Kids especially find it exciting to eat bread that comes out in a perfect cylinder shape because it looks like a special treat rather than just another sandwich. It is also a huge hit as a gift because you can tie a pretty ribbon around the jar and give it to friends or neighbors who will be amazed that you baked it right inside the glass. The sheer novelty of the presentation makes it a conversation starter at any dinner party or family gathering where people are always eager to try a slice.
Making bread in a jar is the perfect choice for many different emotional and practical reasons in our busy lives. From an emotional standpoint baking is a very grounding activity that helps reduce stress and fills your entire home with a warm comforting aroma that makes everyone feel safe and happy. If you are feeling a bit overwhelmed by a hectic week taking an hour to knead dough and watch it rise inside glass jars can be a form of therapy that rewards you with something tangible and tasty. From a fitness or health perspective making your own bread ensures that you know exactly what is going inside your body without any hidden chemicals or weird preservatives found in store bought bags. You can control the amount of sugar and salt which is great for staying on track with your wellness goals while still enjoying a hearty carb. It is also a brilliant idea for emergency preparedness or camping trips where you might not have access to a kitchen but still want the luxury of fresh bread. Having these jars ready to go means you are always prepared for a quick healthy snack or a last minute meal regardless of how busy your schedule becomes.
The taste of this bread is another huge reason why people keep coming back to this specific recipe time and time again. Because the bread is sealed or eaten shortly after baking inside the jar the crust stays thin and soft rather than getting hard and chewy like some artisan loaves. This makes it perfect for people who prefer a gentler bite or for making uniform round sandwiches that fit perfectly in lunch boxes. The flavor of the yeast has time to develop beautifully and the crumb of the bread remains light and airy because the jar acts as a tiny proofing oven. Whether you are spreading some fresh butter on a warm slice or using it to soak up a rich soup the experience is deeply satisfying. It represents a simpler way of living where we take the time to create things from scratch using basic ingredients like flour and water. Once you try your first jar you will likely find it hard to go back to regular bread because the convenience of having a shelf stable homemade loaf is simply too good to pass up.
Ingredients You Will Need
To make the perfect batch of bread in a jar you will need to gather these simple items. Make sure your ingredients are fresh for the best results.
-
3 cups of all purpose flour or bread flour
-
1 cup of warm water around 110 degrees
-
2 teaspoons of active dry yeast
-
1 tablespoon of granulated white sugar
-
1 teaspoon of fine sea salt
-
2 tablespoons of melted unsalted butter or vegetable oil
-
6 wide mouth pint sized glass canning jars
-
A small amount of extra oil or shortening for greasing the jars
Step by Step Method
Follow these easy steps to create your very own bread in a jar from scratch. Do not rush the process as the dough needs time to grow.
-
Start by preparing your glass jars. It is very important to use wide mouth jars so the bread can slide out easily once it is baked. Wash the jars thoroughly with hot soapy water and dry them completely.
-
In a large mixing bowl combine your warm water and the sugar. Stir them together until the sugar dissolves.
-
Sprinkle the active dry yeast over the top of the water. Let it sit for about five to ten minutes until it becomes foamy and bubbly. This shows that the yeast is alive and ready to work.
-
Add the melted butter and the salt to the yeast mixture. Stir gently to combine.
-
Begin adding your flour one cup at a time. Use a wooden spoon or a sturdy spatula to mix the flour into the liquid until a shaggy dough starts to form.
-
Turn the dough out onto a clean surface that has been lightly dusted with flour. Knead the dough by hand for about eight to ten minutes. You want the dough to become smooth and stretchy.
-
Place the dough in a greased bowl and cover it with a clean kitchen towel. Let it rise in a warm spot for about one hour or until it has doubled in size.
-
While the dough is rising grease the inside of your glass jars very well. You can use a brush to apply oil or shortening to every inch of the glass so the bread does not stick.
-
Once the dough has risen punch it down gently to release the air. Divide the dough into six equal pieces.
-
Roll each piece into a small log shape and drop one into each prepared jar. The dough should only fill the jar about halfway to leave room for rising.
-
Cover the jars with a towel and let the dough rise again for about thirty minutes until it reaches near the top of the glass.
-
Preheat your oven to 350 degrees. Do not put the lids on the jars yet.
-
Place the jars on a baking sheet to keep them steady and slide them into the oven.
-
Bake for thirty to thirty five minutes. The tops should be a beautiful golden brown color.
-
Carefully remove the jars from the oven using thick oven mitts because the glass will be extremely hot.
-
If you want to store them for later place the sterilized lids and rings on the jars immediately while they are hot. As they cool the lids will pop and seal the bread inside.
-
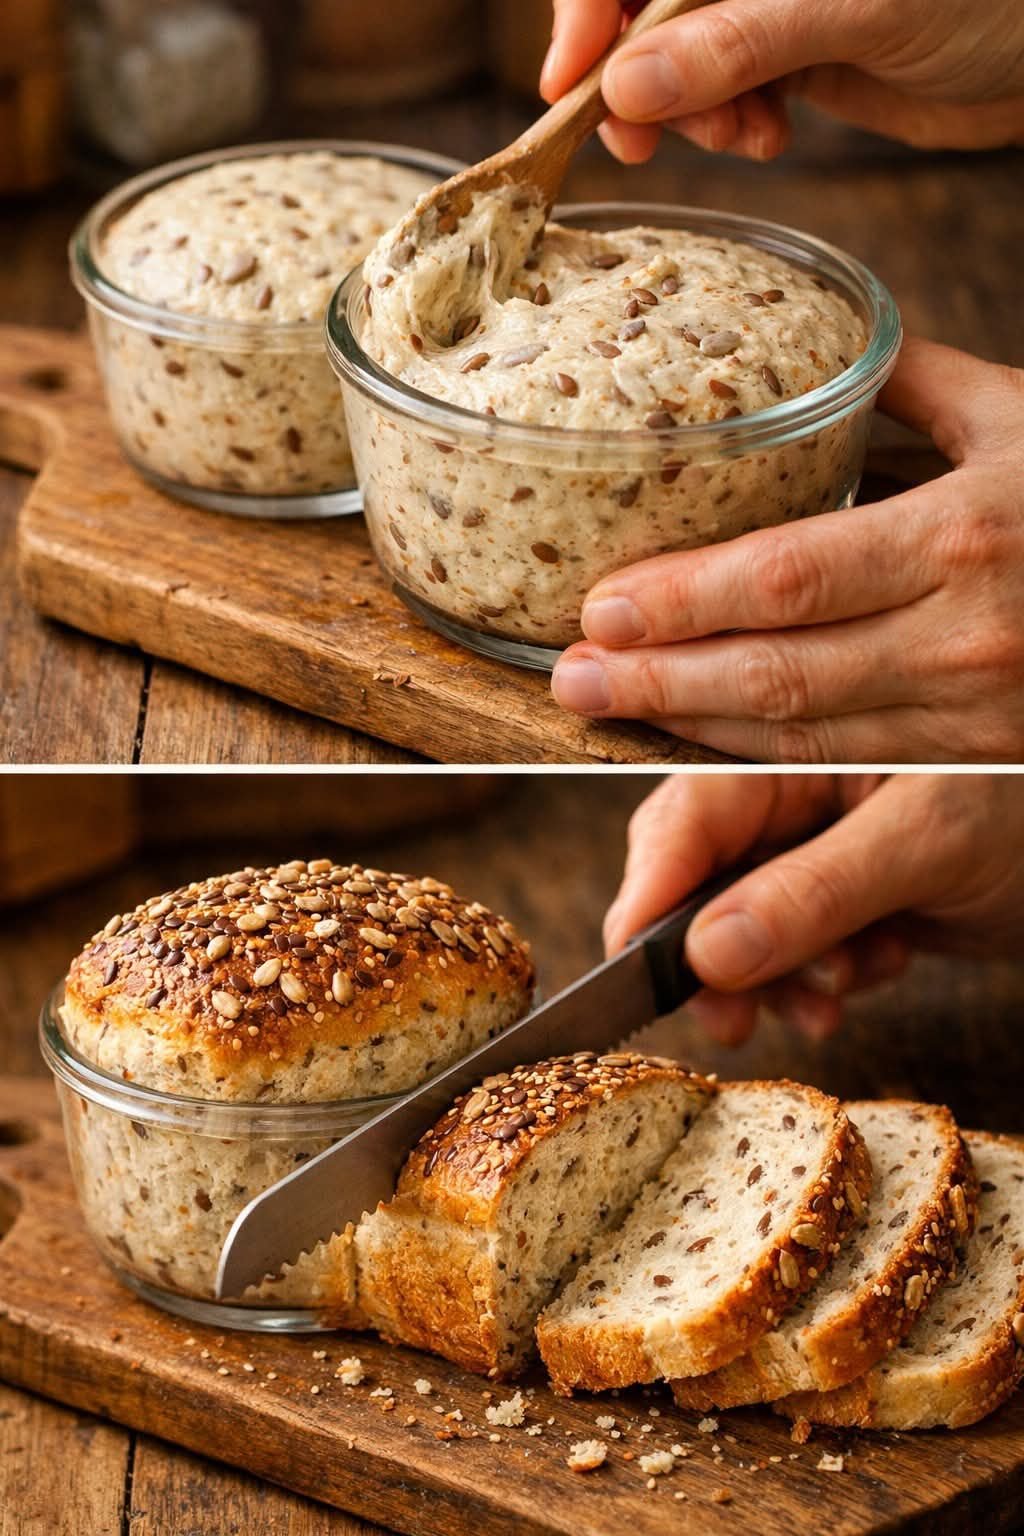
If you want to eat the bread now let the jars cool for a few minutes then run a thin knife around the edge and slide the loaf out.
Why This Recipe Is Special
This recipe stands out because it solves the problem of bread going stale too quickly. Most homemade bread loses its freshness within a day or two but the jar method keeps the moisture locked in tight. It is also a very healthy choice because you are avoiding the long list of preservatives and high fructose corn syrup often found in grocery store loaves. You are in total control of the quality of your flour and the source of your fats. Furthermore this method is very space efficient for people living in small apartments or for those who want to keep a stocked pantry without a lot of bulk. The round shape of the slices is also very aesthetically pleasing and makes every meal feel like a special occasion. It is a recipe that bridges the gap between old world tradition and modern convenience.
Extra Tips for Better Taste
If you want to take your bread in a jar to the next level try adding some dried herbs like rosemary or thyme to the dough during the kneading process. This creates a savory aroma that is incredible when paired with dinner. You can also add a handful of shredded cheddar cheese or some chopped jalapeños for a spicy kick. For those who love a sweeter bread try adding cinnamon and raisins or even some chocolate chips to the mixture. Another great tip is to brush the tops of the loaves with a little bit of melted honey butter right after they come out of the oven for a shiny and delicious finish. Always make sure your water is not too hot when mixing with yeast or you might kill the organisms and the bread will not rise.
Final Thoughts
Baking bread in a jar is a rewarding and joyful hobby that anyone can master with a little bit of patience. It brings the heart of the kitchen into a portable and long lasting format that is perfect for sharing with the people you love. Whether you are baking for a rainy day or preparing a special gift for a friend this recipe will surely become a favorite in your household. There is nothing quite like the sound of a jar seal popping and the smell of fresh bread filling the air. Give it a try and enjoy the simple pleasure of a homemade loaf that stays fresh and delicious whenever you need it.
Nutrition Details
Below is a table showing the estimated nutritional values for one individual jar of bread based on the ingredients listed above.
| Nutrient | Amount Per Serving (1 Jar) |
| Calories | 280 calories |
| Total Fat | 5 grams |
| Saturated Fat | 3 grams |
| Cholesterol | 10 milligrams |
| Sodium | 390 milligrams |
| Total Carbohydrates | 50 grams |
| Dietary Fiber | 2 grams |
| Sugars | 2 grams |
| Protein | 7 grams |
Disclaimer
Please keep in mind that every person has a different body and different nutritional needs. The results of this recipe may change based on the specific brands of ingredients you use or the climate in your kitchen. This article is for informational purposes only and is not intended to be medical or professional health advice. If you have specific dietary restrictions or allergies always consult with a doctor or a certified nutritionist before trying new recipes. Happy baking and stay safe in the kitchen.